Tuesday 28 May 2013

Nivea In-Shower Body Moisturiser Review!

Right, i've been dying to try this ever since i seen it advertised on the TV:


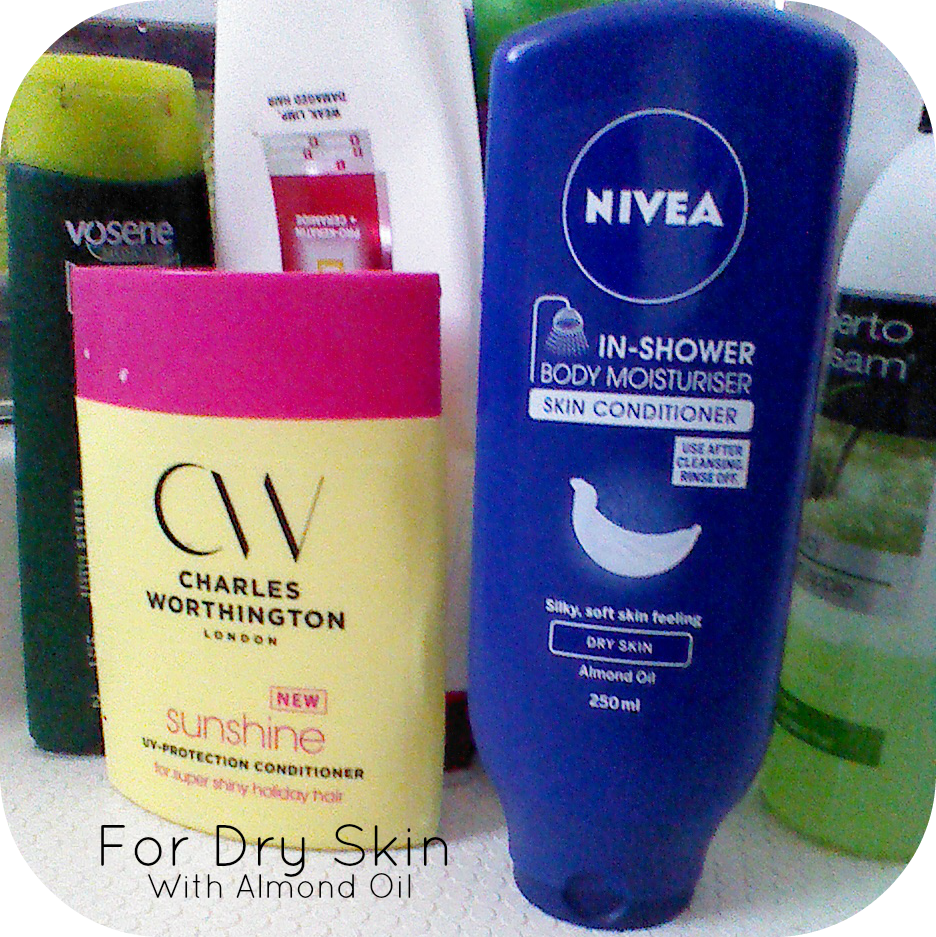
For lazy girls like me, i'm sure you all seen this advert and thought it would be a miracle product that you simply must have in your life.. or at least this is how i felt. So i rushed to tesco this weekend and picked up the Nivea In-Shower Moisturiser 250ml at a special limited time price of £3. 

I picked up the one for dry skin as, although i don't actually have particularly dry skin, i do get dry hands, elbows, knees etc from fake tanning etc.The version for dry skin is the blue bottle and the one for normal skin is the white.


Basically, what this product claims to do is moisturise your skin while you are in the shower to save time doing so when you get out. You can simply moisturise, rinse, dry, dress and go! So i thought i would put this to the test and share my opinions with you lovely lot.

The bottle tells you to cleanse your skin the way you normally would in the shower and rinse. Apply the moisturiser while still in the shower then rinse off, dry yourself, get dressed and go!


So, my shower went a bit like this.. 
Jumped in the shower and washed my skin using a normal shower gel, grabbed my exfoliating sponge and exfoliated using a scrub. I then shaved my legs, rinsed my whole body then grabbed for this In-Shower Moisturiser.


Obviously i am not going to take pictures of myself actually applying this in the shower, but i did want you guys to know about the consistency of it etc. 
I initially thought this was going to be just like a shower gel that you would apply, it would lather and go bubbly, then you wash it off. But i was very wrong. So this is what the product looks like out of the bottle:

(i am wearing pjamma shorts!)

This picture is pretty rubbish at showing but it's the best one i managed to get. So the product is a creamy, white liquid and is actually quite thick compared to what i thought it would be. It does not lather at all it just feels like a normal moisturiser although obviously as you are applying in the shower it is impossible to rub it into the skin until it is dry as you would with an ordinary moisturiser.

So what you do it apply all over your body while still in the shower, then rinse it off. I won't lie, at first i thought.. am i not just washing it all straight back off? But i did what i says to do anyway, rinsed it all off then got out the shower and dried myself off with a towel.

So did it work? 
Well usually when i get out of the shower after exfoliating and shaving my legs feel extremely dry and have a sort of stinging sensation, but when i got out of the shower after using Niver In-Shower Moisturiser i didn't experience this.

After i was completely dry i threw my clothes on and i can honestly say my skin does feel moisturised, it feels soft to the touch especially the top of my arms and my chest area and my legs haven't felt that stingy after shaving before moisturising sensation which can only be good!

I was really sceptical about this product especially as i thought i would just be washing it all off straight after applying but the bottle does claim that it is quickly absorbed by wet skin and leaves you with soft skin straight from the shower without the need for any other body lotions afterwards!

I actually really do like this product so far and am going to keep using it to see how i feel about it after a longer period of time. The only bad thing is that i can tell the bottle isn't going to last very long so it would be an expensive habit to use every single shower!

This is still on offer of £3, or £4 for a bigger bottle from Tesco, and my mum actually tells me it is even cheaper just now in Morrisons so if you want to give this a shot then i recommend you go pick it up just now!

Will you be trying this out?
Have you already tried it? What did you think?
A

Tuesday 21 May 2013

Perfect Summer Perfume Picks!

Heyy 

I'm majorly obsessed with perfume, i love pretty much every perfume i smell and it's rare that i find one i really hate, although there are a few out there!

I love to smell nice so perfumes are my must-have product everywhere i go, i always have a little sample in my bag to touch up during the day and i always have a few on my shelf in my room. However, i hate sticking to the same perfume for prolonged periods and like to switch it up all the time and go back and forth to different ones. Therefore, i thought i would quickly share with you guys my top five picks for this Summer!

These are just the five fragrances i think stand out and are really fresh, fruity and summery! It was hard to just pick five as i had about ten that i would have loved to include but, i managed to just pick five of my faves that i am going to be wearing through Summer 13!


At No.5 i have Forbidden Euphoria by Calvin Klein.


This is a beautiful sweet, floral perfume. It is a bit of a modern, young fragrance in my opinion but it is really lasting and it is great on a night out or when you want your perfume to be quite noticeable  I also love the bottle of this, it has an unusual shape to other bottles and it's purple transparent glass makes it quite girly and pretty.

No.4 is Miss Dior Cherie by Dior.


Another of my all time faves. I buy this a lot and i wear it pretty much all year round not just one i go to for summer months. It is a real all rounder, really fresh smelling and girly with an equally girly bottle. It is an amazing perfume. My one, if you're wondering is the 2012 edition of this perfume as there are a few versions since it's launch in 2005.

Ok so up at no.3 i have Dot by Marc Jacobs.


This fragrance is really summery! It's fruity and girly and really appropriate for Summer. First off, the bottle! I could not love this bottle more. Some people probably hate it but, i absolutely love it. So pretty and summery and it's just something that really appeals to me. This fragrance is really fruity and reminds me of a summer holiday somewhere sunny and beautiful. It's just lovely.

No.2 is J'adore by Dior.


I am a massive fan of Dior perfumes  i think they are really mature and quite sexy but fun and fresh at the same time. This particular perfume is quite feminine and floral rather than sweet. It is definitely one of my go-to perfumes and i have re-purchased this, as well as others from Dior quite a few times. Really long lasting and a major fave of mine.

And up at my current Summer No.1 i have Chance Eau Tendre by Chanel.


Oh, what can i say about this? It is amazing. I love all the Chanel Chance perfumes but the Eau Tendre has to be my favourite. It is quite a floral one again with a bit of a fruity tone, it lasts quite a long time and the bottle is just classic Chanel, simple but effective. Definitely worthy of my number one Summer fragrance. 

I genuinely love all of these perfumes and as a review i would absolutely recommend each and every one of them if you are looking for a new Summer fragrance! 

What are your top Spring/Summer perfumes?
Any you can recommend to me?

A

Monday 20 May 2013

Sleep In Rollers Review!

Hey Guys 

I am such a bad blogger, you can all virtually slap me right now! I, once again am so sorry that i've been missing in action on here for a while, life is busy busy! 

Anyway i'm here again with a bit of a beauty product review. Sadly, i've not done many beauty reviews of recent, mainly because i haven't been finding many new beauty products i'm actually loving! This is sad for me as usually i don't find this a problem but, nothing new is standing out for me just now :(!

However, i have eventually jumped on the Sleep in Rollers bandwagon! I use normal rollers ALL the time, but as i tend to go out on Saturday nights, and i work during Saturday afternoon, i don't really have long enough to leave them in and have a good curl. 

I had heard loads about Sleep Rollers since last year and debated whether to buy them on and off and eventually just never did. However, i have eventually invested and decided to give them a wee go!


If you don't know, Sleep Rollers are basically a softer velcro roller with a squishy sponge center to makes them comfortable to sleep in, basically giving you amazing hair from the minute you wake up! So i put the rollers in my previously blow dried, clean hair. I did however, use a spray bottle to dampen each section and after rolling secured each section with a kirby grip.


This is what i looked like before going to bed (please ignore my makeup-less face!):


Then, for the sleeping. I must admit, and if you follow me on twitter already, you will know i found this difficult to begin with and genuinely threw a little diva strop.

Basically, when you first put your head down to sleep they feel awful! You have to sort of move the rollers around slightly to get them in a comfortable position. Now this is all fine and good if you are a heavy sleeper and are able to sleep in one position all night, but if like me, you wake up at any noise and move around all night like a worm, these are hell to begin with. I moaned and moaned to the point where i was almost ready to rip them out, throw them across the room and eventually get some sleep. However, somehow, at about 01:30, i managed to fall asleep. 

I think i woke up around three times during the night and eventually got up from bed at half seven. In the morning they don't hurt but some do feel a little tight for the first little while. 

Although i absolutely hated the feeling of these in my head when i first went to bed, i would say that i did get used to it once i had found a position comfortable enough to sleep in and did fall asleep with them in. I think after a few times of wearing them to bed i will probably get more and more used to them and be able to get a longer sleep with them in. Someone even suggested to me that you sleep with one of those long, curved pillows and i can see how that might be a bit more comfortable, so if you are having trouble sleeping with your sleep rollers in maybe give that a shot!

Anyway, i left the rollers in while eating my breakfast and doing my makeup in the morning, got dressed, then began taking them out. 

One tip i would say, is to try really hard not to comb the section after you have removed the roller, just twist your hair around your finger and let go, spray it with hair spray and leave it for a while, then if you want to comb it try using your fingers gently through it first or use a really wide-toothed comb. Doing that helps the curl stay and stops it dropping. Here's me just before taking the rollers out:


This, is how my hair looked when i took the rollers out without brushing through:


Then for a function i went to, i styled it with a flower but i only managed to get this really awful picture while the sun is shining right in my eyes and i look really weird but, i don't mind you guys seeing me weird haha!..


Then later, i was still impressed with the volume of my hair and the body it still had after the day:


Overall, i really love the effect the rollers had on my hair and in my own opinion this outweighs all the bad points! I actually think if i kept wearing them and got used to them i would be able to get a better sleep with them in and therefore would mean that the only con i found with them (sleeplessness) would be gone!

Have you tried Sleep In Rollers?
Do you love them, or not a fan?
A

Tuesday 7 May 2013

Barbie Gal!

Hello!

How lovely is the weather this week? I'm getting so excited for Summer and i bet it starts raining tomorrow now i've said that..

Anyway, since it's been nice i thought i would crack out the short shorts again while i can and i'm just going to share a really quick OOTD with you guys before i head outside and enjoy the sun while it's hanging about!


Dress/Karma Shorts/RiverIsland


Shoes/Primark


Bag/F&F

I love this Karma dress but as a dress, its pretty short to wear without leggings or tights so i've tucked it into my beloved high-waisted river island shorts and paired it with my casual cream and black contrast pointed-toe flats from primark and a n oversized cream. tan and brown bag.

How would you style this barbie dress?
Hope you are all enjoying the sunshine!

Oh and i'd be a very happy lady if you could please follow me on Bloglovin' - Here

A

Friday 3 May 2013

DIY Sweet Tree - Cute Gift Idea!

Hellooo 

This is literally my third time trying to upload this post, how infuriating! Anyhow, hopefully it actually works this time! Right, so it was my baby sisters 21st (not so baby then..) last weekend and i wanted to give her a unique cute present that meant something to us both so what i eventually came up with was a flying saucer tree! My sisters fave sweetie is flying saucers so i decided those on a tree would look really really cute. I've seen a few of these online and decided that rather than pay in excess of £30 for one, i could definitely make one myself which would be all my own little touches and would mean more to my sister than one quickly bought online.

This is how it turned out:

Without going on and on, i think the tree went really well and i wanted to share a quick post on how i made it and the steps i took to make it look just as pretty as the ones you buy online!

What You Need:

Polystyrene Ball  - I used a 15cm one £2.99 from Hobbycraft.
Cocktail Sticks - I needed loads of these and got them free from my work.
Dowel Stick - I also got this free from work but you can cut a curtain pole or use bamboo stick.
Sweets - I used flying saucers - around 300!
Ribbon - Any colour.
A Pot or Tub - I used a garden pot i already had.
Plaster of Paris - If you don't have this you can use clay or playdough to pack the pole in.

Lets Get Started!

Step 1:

Firstly, i made a hole in the bottom of my ball and with some glue around the rim i pushed my stick into it and let that dry to attach the ball to the dowel pole. I then used plaster of paris to set my stick into my garden pot and let that dry overnight.


Step 2:

The next stage is to choose a ribbon colour you want to cover your pole in. I chose a really pretty glittery one from Card Factory for £1.99. Basically to attach this all i done was put a little glue at the bottom of the pole and wrap all the way up to the top, cut the excess and glue at the top to secure. It doesn't even have to be very neat at the top of the bottom as it will pretty much be covered. I put some pretty pink tissue crumpled up in the pot and some flower confetti. 


Step 3:

Now your pole and pot look pretty but you need to get on with the ball! This stage is the most fidgety and time consuming although still mega easy. My boyfriend and i sat for ages attaching saucers to cocktail sticks then starting from the bottom of the ball sticking them all in one by one. As i got further up the ball however, i realised that it was actually easier (for me anyway) to stick the cocktail sticks in first, then attach the saucer. Some of the saucers split and some lost their sherbet but, that's ok, just means you get to eat them ;).

Starting from the bottom makes it easier as if you leave that part until last you will find it difficult to go around the pole and fill all the spaces. A tip i would say is that the tree, in my opinion, looks prettier and bigger if you don't push the cocktail right into the ball, instead leave a little space between the sweet and the ball. 


Step 4:

Basically you just work all the way up the ball with the sweets until you can no longer see any of the ball. Then, when you reach the top you just go all the way around seeing if you can in-fill any spaces, then you're done! You can add any other decorative things you want to the pot/pole etc but i like mine the way it turned out and my sister loved it too!

Here's the finished product:


Hope you liked this little tutorial!

If you try this please please tweet me a picture i'd love to see @labellavida2 or tag me in an instagram pic, my insta name is Ashlee_yy

Also, i'm having issues with my posts showing up on blogger and it's really starting to bug me! If you have any suggestions on how i can fix this annoyance pleassse please tell me how!
A